HASSIO - AZ-Envy Dev Board with ESP8266
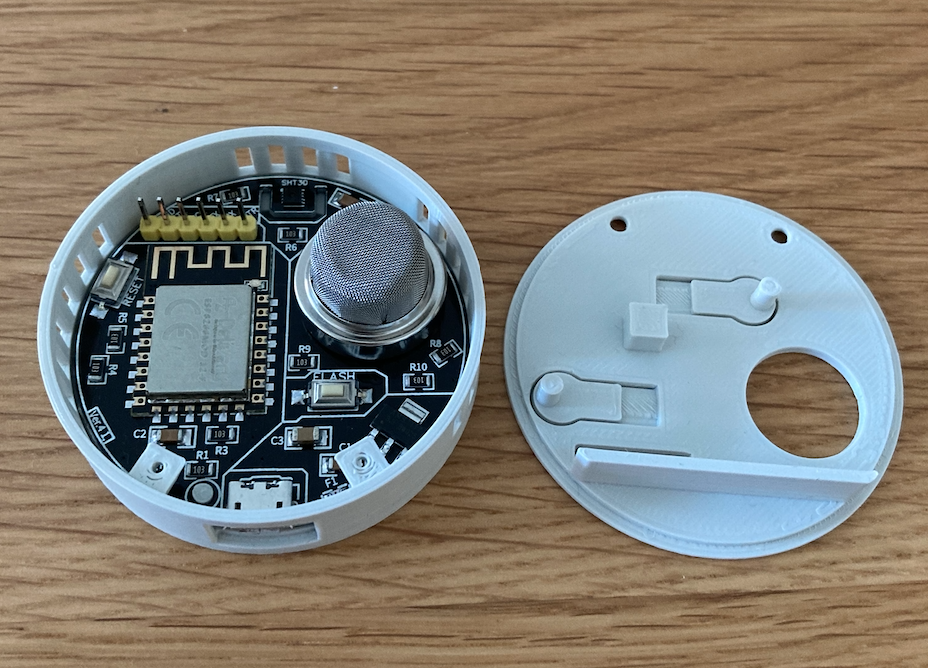
While looking for new sensors, I came across the AZ-Envy from AZ-Delivery and was initially enthusiastic about the description of the sensor board. Of course, I ordered three of them. Anyone who has already dealt with the price issue for sensors knows that one sensor alone is quite expensive, but three or five in a pack usually only cost a few euros more. This is probably due to the fact that the free shipping costs and the processing fee which is also part of the price.
Now a few sentences about the board. I don’t understand why no data lines were added to the USB port. As a result, installing the firmware (for beginners as described so nicely in the ad) is extremely complicated. The standard ESP32 or ESP8266 can be flashed much more easily. Of course, once the first firmware is flashed, all other changes can be made via an Over The Air Update (OTA).
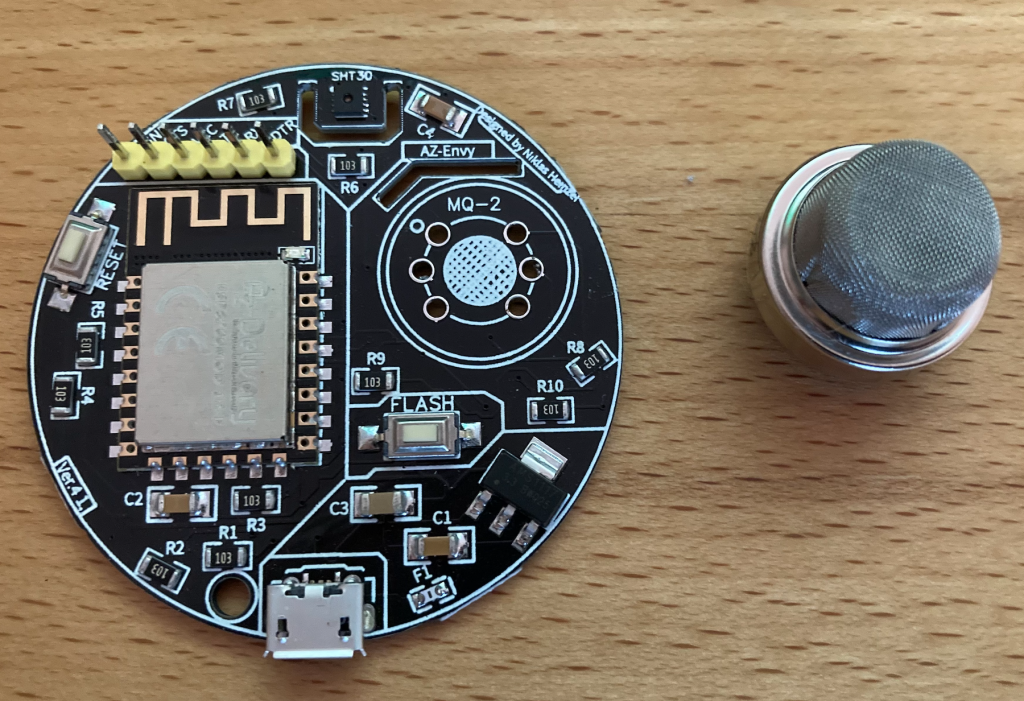
But what bothers me most about the board design is that the temperature sensor is right next to the heater of the gas sensor. Even if the sensor has been running for a while, the temperature sensor spits out a wide variety of values. Unfortunately, no offset helps to adjust the temperature. I haven’t compared the humidity with any other product so far, but from what I’ve read on the Internet, the Dev-Board doesn’t seem to work reliably either.
Hardware required for commissioning
- AZ-Envy Dev Board
- FT232RL Flasher Board
- Jumper Wire (connection cable)
- USB cable from flasher board to PC (Mini USB data cable)
Required software
- ESPHome.io
- HomeAssistant (only for a nice view)
3D printer housing
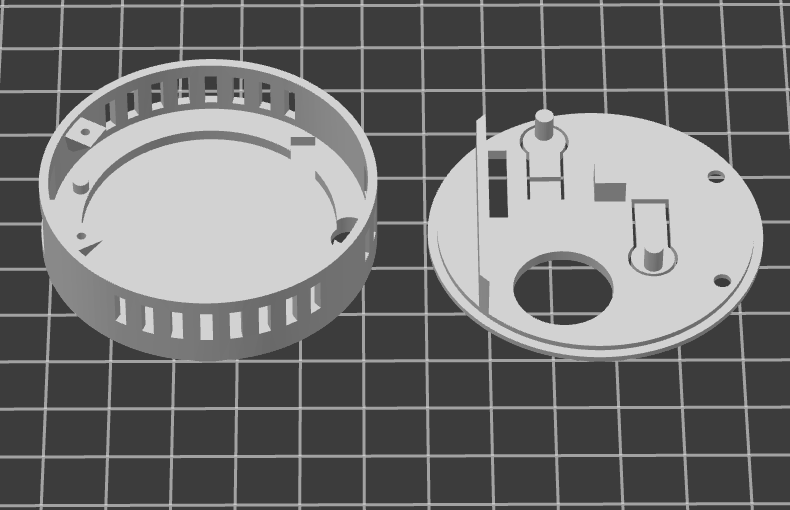
Download 3D-print Box
Creation of the firmware flash file
There are two ways to create the flash file. Here I am describing one of them.
- Flash file created with ESPHome.io
- Flash file created with HomeAssistant
Generate firmware with HomeAssistant
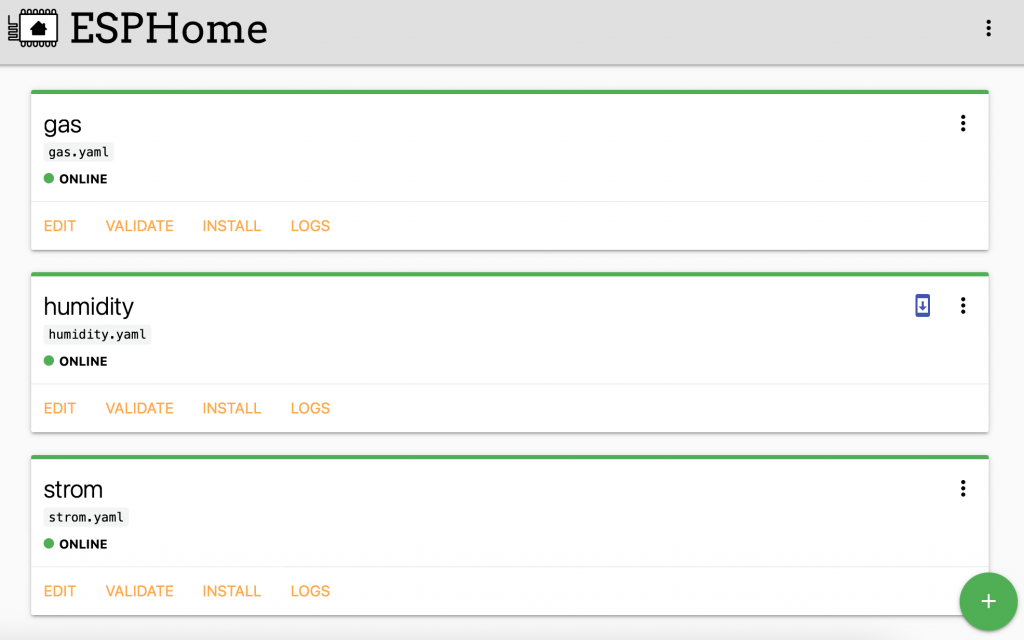
Install ESPHome under HomeAssitant.
Configure and open ESPHome
Press the + button at the bottom of the page
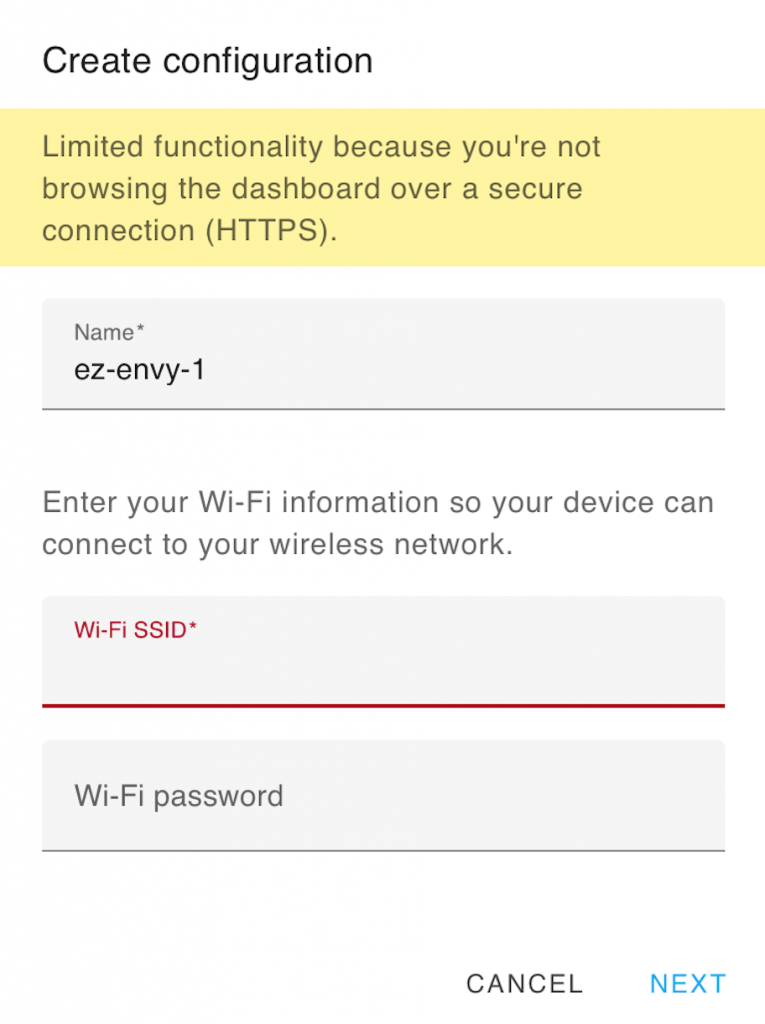
Enter Projektnamens
Enter SSID (WLAN Name)
Enter WLAN Passworts
Press button “next”
Choose ESP8266
Press button”next”.
A congratulation logo should appear. In case of an error, simply press “next” again
The new project has been created and is not yet connected (therefore red).
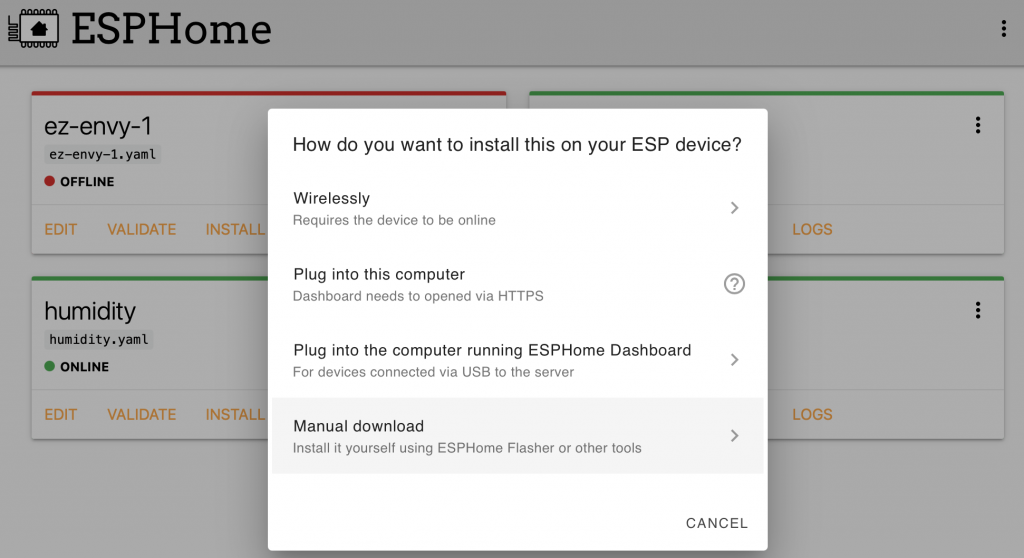
Press Install and then Manual download
The firmware is compiled and then downloaded.
This file can then be installed via the terminal.
EZ-Envy-1.yaml
esphome:
  name: humidity
  platform: ESP8266
  board: nodemcuv2

i2c:
  - sda: GPIO4
    scl: GPIO5
    id: bus_a

sensor:
  #Temperatur und Luftfeuchtigkeit
  - platform: sht3xd
    i2c_id: bus_a
    address: 0x44

    temperature:
      name: "Temperatur"
      id: "temperature"
      filters:
      - offset: -10.0
    humidity:
      name: "Luftfeuchtigkeit"
      id: "humidity"
      filters:
      - offset: 8.0
    update_interval: 10s

  # MQ2 Smoke Gas Sensor
  - platform: adc
    pin: A0
    name: "Gassensor"
    update_interval: 10s
    #filters:
    #  - multiply: 100
        #unit_of_measurement: "%"
    filters:
     lambda: |-
       return (x * 1024/5);
    unit_of_measurement: "ppm"
    icon: "mdi:percent"


# Enable logging
logger:

....
....
AZ-Envy Firmware flashing via Terminal
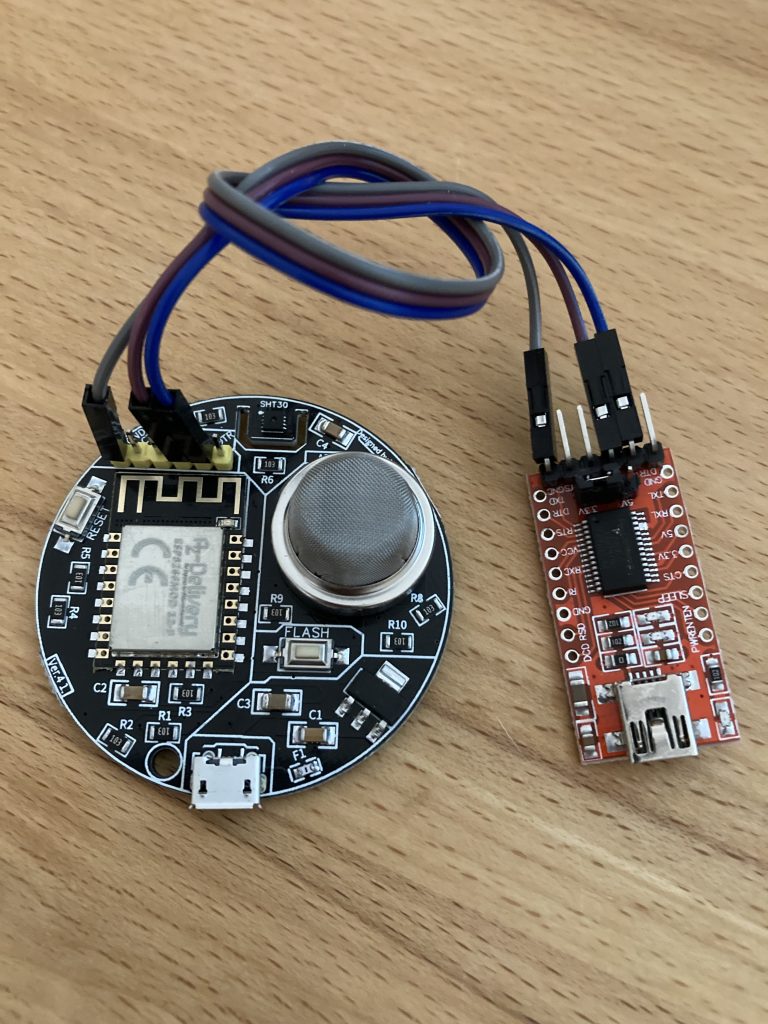
First you have to connect the FT232RL Flasher Board to the AZ-Envy. However, you only need three individual wires (jumper wire). Only the pins GND, RX, TX need to be connected.
Then the AZ-Envy must be supplied with voltage and the FT232RL USB cable is then connected to the PC. You can also connect both USB cables to a USB hub (with external power supply) and then go from there to the PC.
The following steps have to be taken:
- Create Firmware flashfile with HomeAssistant or ESPHome.
- Connect EZ-Envy to FT232RL
- Connect the AZ-Envy and FT232RL to a USB hub with an external power supply
- Connect the USB hub to the PC
- Open Terminal and go to the ESPTool folder
- Check the usbPort name with command (mac os): ls -l /dev/tty.*
-
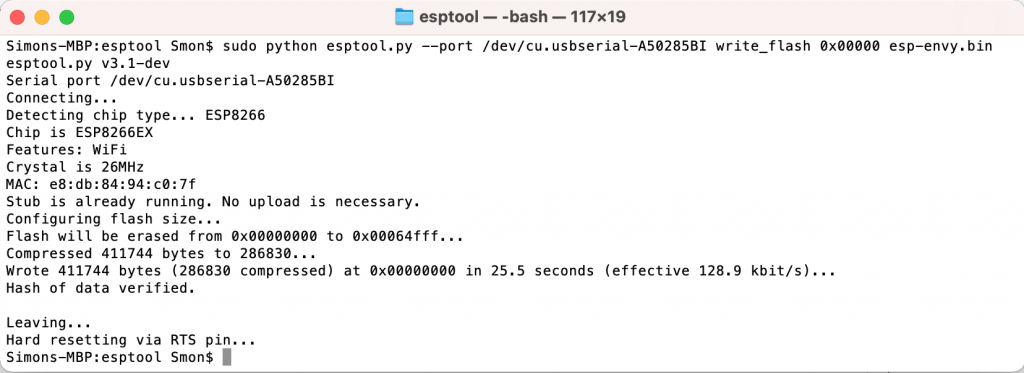
Command: sudo python esptool.py –port/usbPort/write_flash 0x00000 yourFile.bin
sudo python esptool.py –port /dev/tty.usbserial-A50285BI write_flash 0x00000 ez-envy-1.bin
Known issues during flash process
If the device is not recognized correctly and the following output appears.
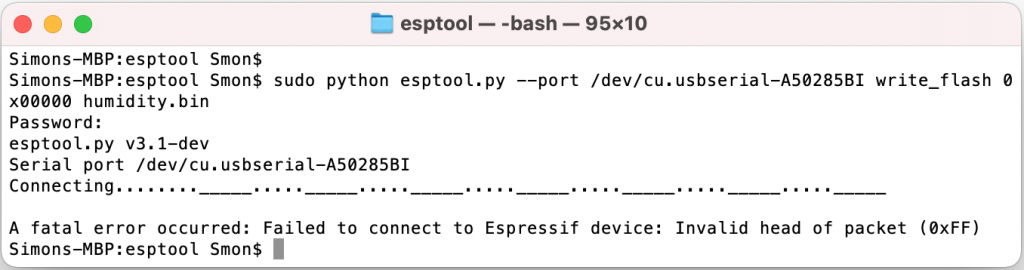
- Hold down the flash button on the EZ-Envy as long as step 2 is finished.
- Unplug the EZ-Envy’s USB cable and plug it in again.
- Now the firmware should be flashed (see picture below)
Check your Python Version (in my case Python 3.10.0):
python3 --version
Install Python3 with the following command:
pip3 install -U https://github.com/platformio/platformio-core/archive/develop.zip
Improvements of AZ Envy
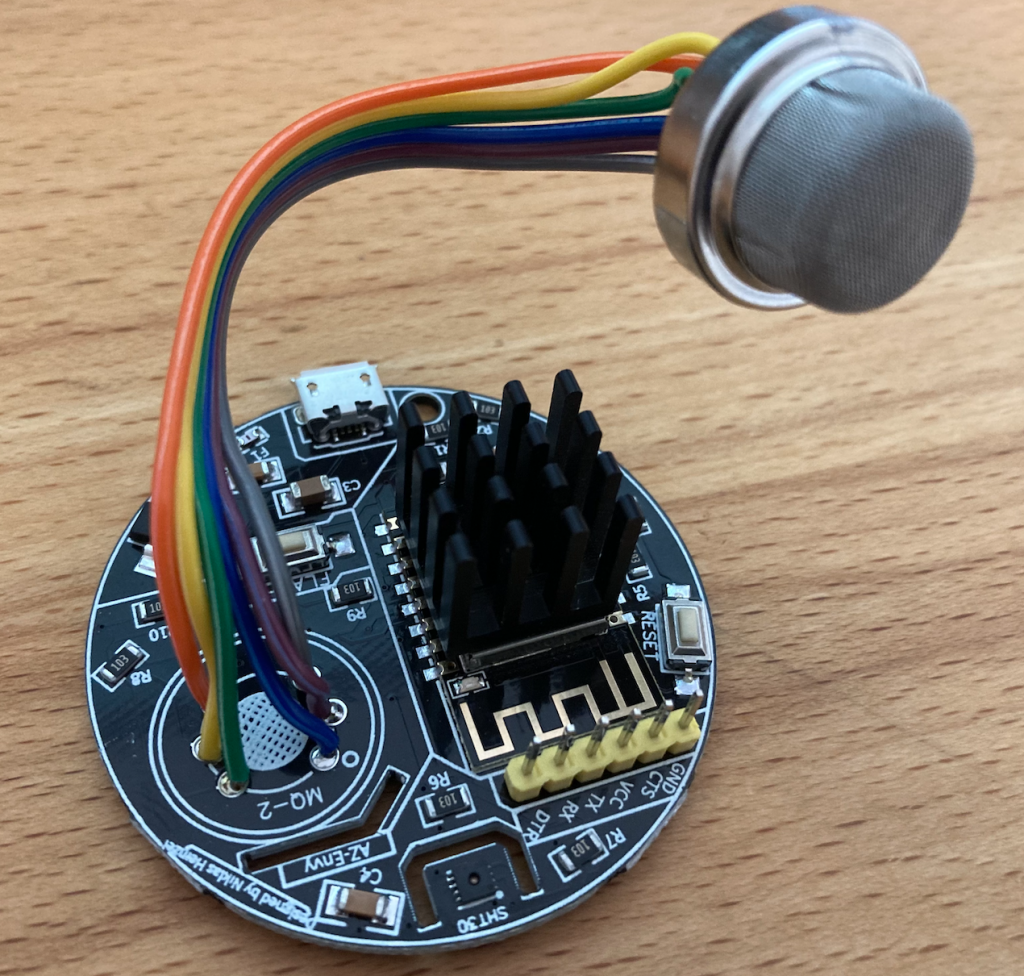
To get correct results from AZ Envy temperature sensor I have desoldered the PM-2 gas sensor. Then I soldered the gas sensor using single wires so that I got a greater distance to the temperature sensor. After that the temp results were much better but not great. I found out that the ESP8266 also emits heat on the metal housing, which slightly fake the measurement results. For this case, I glued a heatsink to the ESP8266’s metal case. Now I only have an offset of -1.0 degrees to my room thermostat.
My conclusion on the AZ Envy
As a development board, I think the board is really successful and it’s fun to work with. If you print out the corresponding case, the price is still reasonably reasonable. The housing also shields the temperature sensor a little from the heating of the gas sensor. Unfortunately, this does not make the temperature values more accurate either.
I will now use my sensor as a gas sensor in the boiler room.